Cooking Finland is on Facebook! Click here. My art blog is here.

Tuesday, March 15, 2011

A cake decorating kids' birthday party

 We have all been really busy this week planning an exciting birthday party.  My youngest wanted it to be a cake decorating party, he wanted the kids to all do what they wanted, but to go home with a pretty cake to take to their family.  We had a further complication that the party had to be completely nut-free because one guest was severely allergic.

My first idea was to just give the kids some icing and sprinkles and let them do anything they wanted.  But then I thought about how hard it is to get the icing on smooth without a lot of crumbs.  Also, when I went to look for sprinkles, all of the Wilton brand sprinkles may contain nuts.  I didn't know that the Betty Crocker brand are actually nut-free.  Plus, I wanted something a little different for the party.

What we ended up doing was icing the cakes with store-bought, nut-free icing, and covering them with rolled fondant.  Then the kids were able to paint on the fondant with food coloring dissolved in water, and brand new paint brushes.  Here is how we did it:

First, I took large Zip-lock semi-disposable plastic containers and covered the inside of the lids with foil.  Then I put the lid on the container and made sure that it could still close before Wrapping the foil around.  One for each party-goer.

In the invitation, I asked each kid whether they would like chocolate or vanilla cake.  I baked the little cakes in bread pans, they were the perfect size to fit on the lids.  I also baked some in square pans and cut them in half, but next time I will just use the bread pans.  Putting a piece of parchment paper in the bottom of the greased pans made the cakes come out really easily.  Before I did that a couple of the cakes stuck and were hard to get out.

After the cakes cooled, I put each one on a lid and covered it with the container, they looked just like real cake plates.

Then I made the fondant, wish I had some photos to show you, but maybe I will make a princess cake soon and demonstrate with photos!  At least my family hopes so...

For the fondant, I used a marshmallow rolled fondant recipe.  Use equal WEIGHT of marshmallows and powdered sugar.  Grease a large bowl really well with butter or shortening, and fill it with the marshmallows.  Melt them in the microwave for a couple of minutes (this time will vary with different microwaves).  Then stir in powdered sugar until it makes a very stiff dough.  I used my stand mixer, but greased the dough hook and bowl really well.  I made so much for the cakes, I separated it into smaller balls and put them in plastic wrap for the night.  Just before the party, I warmed up the balls in the microwave and used more powdered sugar to roll them out.  I am afraid I was covered in powdered sugar for most of the party!

At the party, each guest took their cake and covered it with icing.  I decided not to make homemade icing because I really like the cream-cheese flavored icing that is available, and it was nice for each guest to have their own container.  The kids put as much or as little as they wanted, it really didn't matter at all for this part.

Next, I helped them put a sheet of fondant on the cake.  They smoothed it down and took plastic knives to cut away the excess.


Painting the cakes was so much fun!  At first, the kids didn't quite believe me that they could paint on the fondant, but after a lot of reassuring, it was a big hit.  I also found some food coloring paint pens in my cabinet, these were left-over from a cookie-decorating project.


The kids painted (or wrote) whatever they wanted on their cakes.  We had tie-dye, nature scenes, and even a hedgehog.  Plus quite a few messages...


Next, the kids moved over to the candy table where we had some sprinkles and candy to finish off their creations.  We had pastry bags with colored icing to use to attach the candies.


When they finished decorating their cakes, we had cupcakes available to decorate and eat at the party.

Here are some photos of their creations, enjoy!


The kids also took turns swinging a plastic bat (while blindfolded, of course) at a Kirby pinata.  The birthday boy had a lot of fun making and filling this pinata!


We put the "lids" on the cakes and labeled them for the kids to take home to their families.  The kids were so proud of their creations!


Tuesday, March 8, 2011

Gotland bread--Gotlanninleipä


The next in my series of rye bread is from the baking book, Parhaat Leivonnaiset, called Gotland bread.   My husband took one taste and said that it tastes exactly like the limpa made by the bakery in his home town between Kokkola and Jakobstad.

On the first day, boil 4 cups of water and let it cool to lukewarm.  Add 1 1/2 teaspoon vinegar and 1 1/2 teaspoon salt, then stir in 3 3/4 cups (9dl) rye flour. 

Cover the bowl with plastic and let it stand over night.


On the second day, I sprinkled on two packets (4 1/2 teaspoons) of dry yeast.  If you use 50g fresh yeast instead, dissolve it in a little water before adding it.  Add 4 teaspoons of fresh ground anise or fennel seed.  This is some from my garden last year, we've had it for 7 years now, and it grows like a weed, reseeding itself freely.  I probably could have ground it a little better than I did (maybe with a food processor), but it was fine in the finished bread.


I didn't use my stand mixer this time, the bowl was being used for the hedgehog birthday cake.  I added 2 tablespoons of dark brown sugar and about 3 3/4 cups of bread flour (you could substitute all purpose flour if you need to) (this would be about 9 dl).  I mixed in the flour 1/2 cup at a time, with a spatula as long as I could still stir it, then I switched to kneading it with my hands.  You have to do it by hand once in a while to really appreciate how easy it is to knead it with the stand mixer!

A little flour on top, then I covered it and let it rise in a warm spot until about double (it took a little over an hour).


After rising, I punched it down and made it into two round loaves.  I placed these on parchment covered cookie sheets and covered them to rise again, about 40 minutes.


After the second rising, I dissolved a couple tablespoons of brown sugar in a little water and brushed it on top of the loaves.  The original recipe calls for 1/2 dl of coffee and 1 Tablespoon of syrup.  If I had had some coffee left in the pot, I would have used a couple of tablespoons of that instead of the water, but unfortunately I didn't.  Next time I'll plan ahead better...


The loaves baked in the bottom of the oven for about an hour at 400 F (200 C).

I've noticed that all of the rye breads taste better the second day.  I keep them in plastic bags, and the crust softens and the flavor improves overnight.  

Enjoy!

Monday, March 7, 2011

The Hedgehog Birthday Cake (siili kakku)


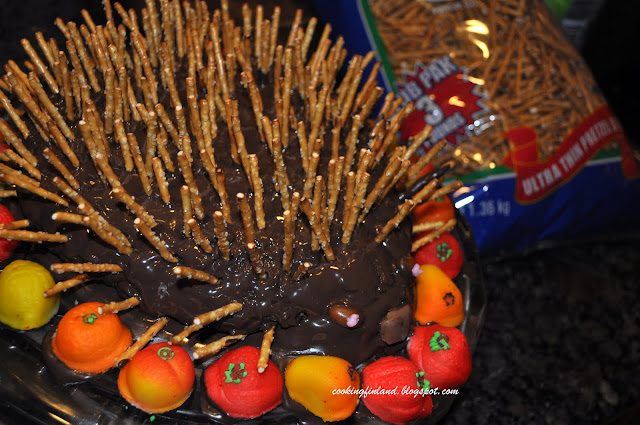
This is my youngest's birthday cake, he loves hedgehogs of all types, in the past we have made hedgehog cakes, cupcakes, piñatas, jack-o-lanterns, and even a pinewood derby car.  I had planned to make a cake decorated with strawberries and cream, but he was home sick today and I didn't get a chance to go shopping for fresh fruit.

For the cake base, I used a Finnish recipe from Parhaat Leivonaiset.  The ingredients were:

5 eggs
1 cup sugar (2 1/2 dl)
2 teaspoons vanilla sugar or vanilla
1/2 cup flour (1.25 dl)
1/2 cup potato or corn starch (1.25 dl)
2 1/2 teaspoons baking powder

Preheat the oven to 300 F (150 C).

First, I whipped the eggs and sugar until frothy with my stand mixer, they looked like this:


In another bowl, I mixed the dry ingredients.  I bought vanilla sugar this weekend at Ikea, so I mixed it with the dry ingredients.  If you use liquid vanilla, mix it with the eggs.

Carefully fold the dry mixture into the egg mixture.


To make a hedgehog shape, I greased and floured a large oven-safe Pyrex mixing bowl and filled it with the batter.

I baked the cake on the bottom rack of the oven for about 50 minutes.

The recipe I used baked the cake in two cake pans, at 350 F (175 C) for 30 minutes.  I lowered the temperature and lengthened the time so that I could get the cake done in the middle.  We've had a lot of practice baking in this bowl to make Barbie cakes for my daughter!

The middle sank in a bit right at the end of baking, but not enough to hurt.    


To get the cake out, I ran a knife around the edge and inverted it on a rack. 


After it cooled a bit, I sliced it in two layers in order to put in a bit of strawberry jelly (hedgehog blood?).  I drizzled the juice from a can of pineapple on both halves first to moisten the cake.


It was easy to push the bottom layer into a hedgehog head shape as I put the cake back together.


Melted chocolate was a good hedgehog-looking coating for the cake.


We had a huge bag of thin pretzels, it didn't take long to put in the spikes while the chocolate was still warm.  The plate got a bit messy from the melted chocolate, so I added a border of marzipan candy fruit.  The eyes are sugar babies (caramel candy) and the nose is half of a Dajm toffee candy.  

Next time I need to coat a cake with chocolate, I think I will try to keep the cake on a rack and let the extra chocolate drip off before putting it on the serving platter.  But wouldn't all this fruit make a great snack for Hedgie?

Laskiaispullat, Traditional Fat Tuesday Pulla


This weekend we made traditional Fat Tuesday pulla, sweet rolls filled with almond paste and whipped cream.  Our kids look forward to these every year, but Easter is so late this year that it has been hard to wait.  

The ingredients for the buns are:

2 packages of yeast (4 1/2 teaspoons dry or 50g fresh)
7 Tablespoons butter (100g)
1 1/4 cups milk (3 dl)
1/2 teaspoon salt
1/3 cup plus 4 teaspoons sugar (1 dl)
1 egg
1/2 teaspoon baking powder 
about 4 cups of flour (about 1 liter)

Melt the butter and warm the milk to lukewarm (I put it in the microwave for about a minute).  Do not get the milk too hot or the yeast will die and the bread won't rise.  Dissolve the yeast and stir in the salt, sugar, egg and baking powder.  I used my stand mixer and dough hook to knead in the flour, 1/2 cup at a time, until the dough pulled away from the sides of the bowl.  It took the full 4 cups this time for me.

Then I moved the dough to a lightly greased non-metallic bowl to rise.


I sprinkled the dough with a little flour, covered it, and put it in a warm spot for about an hour, until it had about doubled in size.

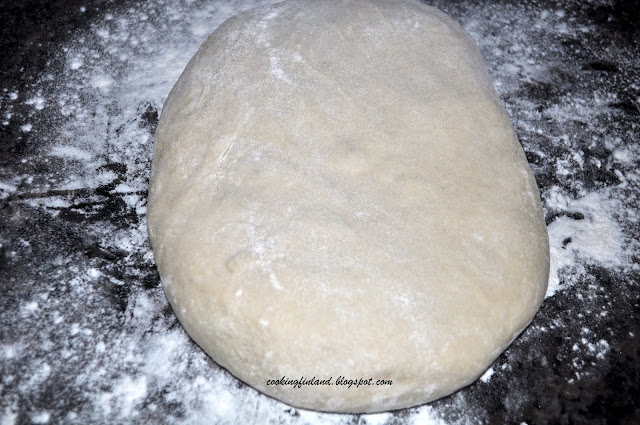
Then punched down the dough and put it out on the lightly floured countertop to knead smooth.  This is such a warm and soft dough, really fun to work with.


I divided the dough into 16 approximately equal pieces, by cutting the dough in half, then in half again, then again...


I shaped each of these into a smooth ball by tucking the edges of the dough to the back side.  Then these  were covered and left to rise again, about 30 minutes.


Preheat the oven to 450 F (250 C).  Before baking, brush the buns with a little beaten egg so they will brown nicely.  Bake them for about 10 minutes, be careful because they burn easily.


After the buns are cool, carefully cut them open and pull out the soft bread in the middle. Save these middles to use in the filling.


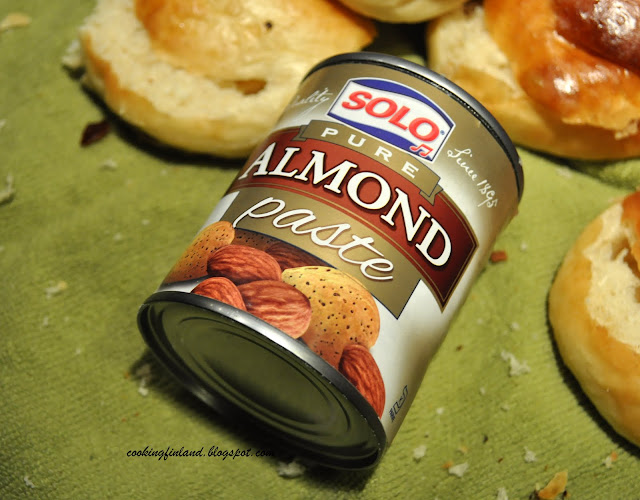
This is the almond paste I used in the filling.  Solo also sells a sweetened kind, it would work, too.


Put the almond paste, reserved bread middles, and a couple tablespoons of milk in a food processor and process until it makes a smooth paste.


Divide the filling among the buns.  Right before serving, whip some cream and sweeten with a few tablespoons of powdered sugar.  These buns don't keep after the whipped cream is added...especially if you have teenagers...


Potato flat bread--peruna rieska


We needed some fresh bread to go with the hot dog soup yesterday, so I made potato flat bread.  This is a great bread to make if you have leftover mashed potatoes, like we did.

I used: 

2 cups mashed potatoes (5 dl)
4 Tablespoons butter, melted (about 50 g)
1 1/4 cups of flour (3 dl)
1/4 cup of rye flakes

No trick to making these, I just mixed everything well in a bowl.  For variation, you could substitute whole wheat flour.  You could also trade out the rye flakes for other grains such as oatmeal or cracked wheat, or just omit them and add a little extra flour.


The dough was very sticky, but I sprinkled it with extra flour and used about 1/3 of the dough to make a thin round on a cookie sheet lined with parchment paper.


I used a fork to make a criss-cross design on the bread, and baked it at 450 F (250 C) for about 20 minutes, on the bottom rack of the oven.


Cut in wedges and enjoy it while it is warm!  

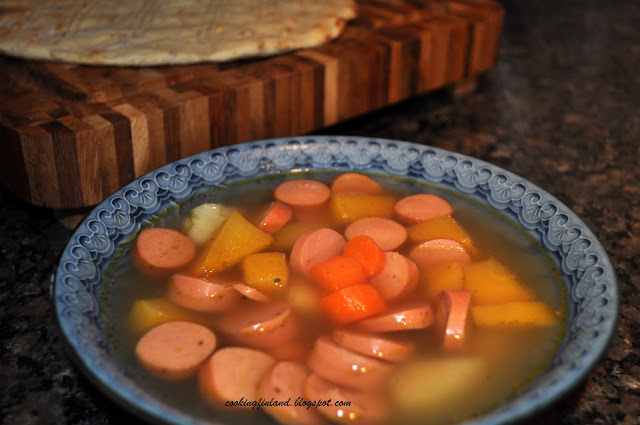
Hot dog soup, Finnish comfort food for a sick boy. Makkarakeitto/Korvsoppa

My youngest is sick, typical winter cold that the kids have so often.  With his sore throat, soup is the only thing he wants to eat, so yesterday I made him some hot dog (or sausage if you want to translate directly) soup.  This is everyday food in Finland, something my sister-in-law says that she makes on busy working days on the farm.  It is a comforting and tasty soup that children (and their parents!) really enjoy.

If I were in Finland, I would just buy a bag of frozen mixed root vegetables, but now I had to spend a little time peeling and chopping.  I used a rutabaga, 6 small potatoes, and 4 carrots.  A leek would have been good but I didn't have one.  I tried to chop everything into about the same-size pieces so they would cook evenly.


I covered these vegetables with about 8 cups of water and brought them to a boil in a large covered saucepan.  I added 3 cubes of Knorr beef boullion, Knorr cubes make twice as much broth as most other brands.  This is the brand I usually use when in Finland, it is usually in the Mexican food section of the stores in our area, or you can order it from Amazon.  


While the vegetables cook, cut up the hot dogs into small pieces.  I used two packages (12 hot dogs) because the kids were really hungry.  You can use less if you like.


When the vegetables were completely soft, I turned off the heat and added the hot dogs.  Don't cook the soup anymore after the hot dogs are added.  


You can add salt or pepper to season, or just serve as is, like we did.  Enjoy!