Cooking Finland is on Facebook! Click here. My art blog is here.

Thursday, March 24, 2011

Missouri Ozarks Cashew Chicken


Last night I was discussing food from the Missouri Ozarks with some friends on Facebook.  Anthony Bourdain has a show where he visited my home town of West Plains, Missouri (airing next Monday on the Travel channel).  You can find the link to details about the show here.  His show is known for trying really exotic food, in West Plains he skins his own squirrel for squirrel pot pie.  What he really should have been showing is one of the best foods to come out of the Ozarks, cashew chicken.  A lot of my friends asked for the recipe, so even though it has nothing to do with Finland, here it is...

This chicken also has nothing to do with China or Chinese food, except that evidently a Chinese restaurant in the area invented it a long time ago.  You can't get this dish anywhere else in the U.S., as far as I know.  They have cashew chicken on some Chinese restaurant menus here in the north, but it is a very different dish, with unbreaded chicken, hot peppers, and cashews cooked in the sauce.  My Mom has been making this at home since I was a kid, so I called her and got the exact recipe.

Here are the ingredients that I used to make more than enough for the five of us:


3 pounds boneless, skinless chicken (1.3 kg)
3 eggs 
3/4 cup milk (1.75 dl)
1/2 teaspoon salt
1/4 teaspoon pepper
flour to coat the chicken twice
frying oil, the recipe called for peanut oil, but I used canola oil

For the sauce:
3 cups of water (7 dl)
3 chicken boullion cubes (if you use the Knorr cubes like I did, they make 2 cups each, so only use 1.5)
6 tablespoons cornstarch
6 teaspoons sugar
3 tablespoons oyster sauce (or substitute soy sauce)

To serve:
Cashews, green onions and rice.

I started by cleaning and cutting up some green onions:


I cooked rice in a rice cooker.  We ate it with plain rice tonight, I'll post my fried rice recipe another time.  (This post already has so many photos!)


The chicken breasts I used were frozen.  They cut up really well while they are still partially frozen.  I laid the chunks on a jelly roll pan to thaw more.  Meat thaws quicker if you lay it on something metal.  Don't make the chicken chunks too big, they get a lot bigger when you bread them.


To make the sauce, boil half of the water (1 1/2 cups) with the boullion.

Stir the cornstarch, oyster sauce, and sugar into the other half of the water.  Make sure to mix it well.


Pour the mixture into the boiling water, stirring constantly so it stays smooth.  Continue stirring and cooking until it boils again.

When it comes back to a boil, the sauce will become more transparent and thicker.


While I was making the sauce, I put flour on the cubed chicken.  I didn't measure exactly, but it was probably about a cup of flour.  Just coat them really well.  Let the chicken sit for 15 minutes at this point.  The jelly roll pan was a great container to do this in.


Break the three eggs in a large mixing bowl.  Stir them well, then stir in the milk, salt, and pepper.  Did you ever notice how hard it is to break up egg yolks if you don't break them before you add the other liquid?

While the chicken is in the egg mixture, put a cup or more of flour on the jelly roll pan that you had them on before.  Dip the wet chicken nuggets back in this flour before frying them.


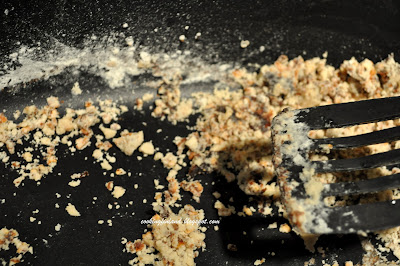
Heat the oil in a heavy pan.  Test the temperature by dropping a bit of the breading in the oil, when it bubbles and floats the oil is ready for the chicken.  If you put the chicken in before the oil is hot, it will get too greasy.

I used my Grandma's old cast iron skillet.  You need quite a bit of oil, a deep fryer would also work great.  I used canola oil, but the recipe specified peanut oil.  Peanut oil would have been good to use, it has a higher smoking point, but I didn't have any.  Don't overcrowd the pieces in the pan.  It takes a while to fry all the chicken...


I have a very unscientific method of testing the chicken for doneness...I pull out the biggest piece and cut it in half.  If it is done, then they will all be done.  I like to use chopsticks to turn and remove fried food, but tongs or even a fork would work.  Drain the chicken on a plate covered with paper towels.


Serve the chicken immediately.  We like to assemble the dish on our plates, rice, then chicken.  Pour the sauce over the top and sprinkle with green onions and cashew pieces.  There is something about the combination of cashews and green onions that is irresistible!

One last warning, it is very easy to eat too much of this dish!

Tuesday, March 22, 2011

Lihakeitto--Finnish Beef Soup


For dinner tonight, I made lihakeitto, which literally translates as "meat soup."  Not a very appetizing name for such a delicious dish.  It was so cold and rainy today, and this was so warm and nourishing, the kids loved it.  This is a really typical Finnish food, delicious and filling.

First, I chopped up the leftover meat from last night's roast, I believe there was about a pound left (.4 kilos).  I chopped up about an equal amount of potatoes, in this case about 5 medium.  The carrots are from a bag of "baby carrots."  I tried to get all of the ingredients into about the same size pieces so that they would cook in about the same amount of time.  That is always a good idea with soup ingredients.

If I hadn't had leftover cooked meat, I would have chopped up pieces of a fresh roast and browned them in the stew pot before adding the other ingredients.


Next, I chopped up a rutabaga and added it to the pot with the other ingredients.  Note that I'm still trying to keep the pieces the same size as the potatoes and carrots.


I used three leeks in the soup.  You could use less if you want, or substitute with one onion.  If you use leeks like I did, make sure and wash them really, really well.  Leeks are always full of sand and grit, and the dirt is inside the green tops.  I like to slice the leeks up first before washing them and straining them at least twice.  If you slice them before washing, all the grit falls out.  It is really frustrating to try to wash them when they are whole.


I added 12 whole allspice to the soup.  This gives a really wonderful flavor.  Some recipes also use a bay leaf, but I didn't today.  I added about 8 cups of water and 2 tablespoons of salt to the pot.


Here is what the soup looked like before it started cooking.  I brought the soup to a boil on high heat, then reduced it to low to simmer.


This is what it looked like after one hour of simmering on low heat (I had the lid tilted on the pot so it wouldn't overflow).


After two hours of simmering, here is the finished soup.  I added one Knorr beef bouillon cube to make the broth just a little richer.


It was so good!  We enjoyed it with crispbread and Kalle's caviar from Ikea.  Well, at least we grownups enjoyed the Kalle's caviar paste, it seems our kids have not learned to appreciate pastes made of salty fish eggs yet...funny how it reminds my husband of his childhood, yet our kids won't eat it.

Pimento cheese


As you've probably guessed from all the pepper photos in this blog post, this one has absolutely nothing to do with Finland.  Other than the fact that my Finnish husband loves to eat pimento cheese, that is.

Pimento cheese is something I grew up eating, and didn't realize what a delicacy it was until I moved away from the Ozarks and was unable to buy it at the nearest Wal-Mart.  Trader Joe's carried it once, but it tasted really strange and not at all like what we were expecting.

First, I roasted some sweet peppers under the broiler.  These are the little sweet peppers that are popular right now, but the bigger sweet ones work just as well.  Note that these peppers are not spicy at all.  You could also buy the peppers in a little jar already roasted, labeled "pimento peppers," but it is so easy to roast them.  I just sprayed them with a little cooking spray (you could also just put a little oil all over them) and put them under a hot broiler for a few minutes.  I salted them because I have other plans for the yellow ones, but you don't have to.  Watch them closely, they blacken in just a few minutes!


I sorted out the red ones to use for the cheese, only because they are prettier with the yellow cheese.  I pulled out the stems, de-seeded them, and diced them.  If you use larger sweet peppers, you may want to pull off the blackened skin.  These little ones have such thin skin that I didn't need to.


I used two cups of shredded cheese and about half a cup of diced peppers.  The cheese in this photo is a colby and monterey jack blend that was already finely shredded, but any kind of cheddar cheese will work.  Experiment with the kind of cheese you like best.


I stirred in about three tablespoons of mayonnaise, just enough to hold it together.  In this photo I used  fat free mayonnaise.


Enjoy the pimento cheese on crackers, or use it to make a delicious ham and cheese sandwich.  The flavor gets even better after a couple of days in the refrigerator.

I'm wondering how this would work as a filling for a Finnish sandwich cake...

Gravy


My grandma taught me to make gravy long ago in her little kitchen with painted green cabinets.  My grandma was blind when I knew her, but when she was younger she used to cook at a small hospital, and I think she was probably the best cook I ever met.  I still have her ragged old cookbook in my collection.  She is probably my main inspiration for writing this blog, even though she probably never heard of Finland.  When I look at her old cookbook, I think about what it would be like if I had a more personal account of how she cooked.  Hopefully someday my kids will look back on this silly experiment of mine and appreciate all the work that went into it, and enjoy cooking along again.

Almost every Sunday, Grandma would bake a chicken and make gravy from the drippings in the pan.  She always rubbed butter inside and out on the chicken and then coated it with flour and salt before baking it, and the drippings from that chicken made the best gravy I have ever tasted.  My friends always wanted to come eat when she baked one of those chickens.

Well, since this is Cooking Finland, and my Grandma was born and raised in the Ozark mountains, I didn't make Grandma's chicken for this blog post (I might have to bend the rules later and make it anyway!).  Instead, I already had a roast in the oven, so I decided to make gravy out of Beatrice Ojakangas' book, The Finnish Cookbook.  The recipe was very similar to my Grandma's, with a few exceptions.

First, this is what the roasting pan looked like when the roast was done.  Not too much fat, if there had been more than a couple of tablespoons, I would have drained it out.


Beatrice added one onion to her gravy.  I didn't have a fresh onion, so I substituted two tablespoons dried minced onion.  I would have browned the fresh onion, but the minced onion didn't need it.  Note that I put the heavy baking pan directly on the stove to make the gravy.


Now for the important part.  Add 3-4 tablespoons of flour to the warm pan and stir constantly until the flour browns.  Keep working the flour furiously to get it in as small of pieces as possible.


Beatrice put an exact amount of milk to add in her cookbook, 1 cup.  I added 1 cup milk, stirring as hard and fast as I could, scraping the bottom of the pan well, but it was not enough.  Just keep adding milk until the gravy is the consistency that you want.  In this case, it was 1 1/2 cups (3.5 dl).  Following the recipe, I also added a teaspoon of dry mustard and salt and pepper to taste.  With the mustard, I added a tablespoon of brown sugar, I felt it needed it.

We all agreed that next time we'll leave out the mustard altogether.  We ate the gravy in typical Finnish style with boiled potatoes and roast beef.

Thursday, March 17, 2011

Milwaukee Rye Bread--Milwaukee ruisleipä


We've been waiting all week to cook a package of corned beef, and it smells so delicious in the slow cooker.  To go with it, I decided to make some good old American rye bread today, in addition to the soda bread.  I used another of Beatrice Ojakangas' recipes from Great Whole Grain Breads.

To make 2 round loaves, the ingredients are:

1 package active dry yeast (but I used 2 packages, or 4 1/2 teaspoons)
2 cups warm water
2 tablespoons caraway seeds
1 Tablespoon dark brown sugar (but I used two!)
2 teaspoons salt
2 Tablespoons softened butter
2 cups dark rye flour
2 1/2 to 3 cups bread or all-purpose flour (I used 2 1/2)
Milk to brush the top of the loaves
More caraway seeds for the top of the loaves

In the bowl of my stand mixer, I dissolved the yeast in the warm water, and added the caraway seeds and brown sugar.  I used more yeast than the recipe called for--for this amount of liquid, I always use the equivalent of 2 packages of yeast.  I also added a bit more brown sugar, because we like a sweet molasses flavor in rye bread.  Make sure your water isn't too hot or it will kill the yeast and the bread will not rise!  I use tap water which I warm for one minute in the microwave.

Yeast bubbles in warm water if it has a little food source, in this case the brown sugar.  If it does not bubble after 5 minutes, the yeast may have been old, or the water too hot.  The bubbles make the bread rise.


I mixed in the two cups of rye flour with the dough hook of the mixer and then scraped down the bowl with a spatula:


I added the white flour a half cup at a time while mixing with the dough hook.  Here is what it looked like after 1 cup:


It was still a little sticky after 2 cups:


But after 2 1/2 cups, it pulled away from the edges, so I didn't use the additional 1/2 cup.


I put the dough in a greased, non metal pan to rise.  I greased it with just a bit of cooking spray, then I sprinkled the dough in the bowl with a bit of flour before pulling it out and shaping it into a ball.  Sprinkle the top of the dough with flour so it doesn't stick to the dishtowel it should be covered with as it rises.

Put the dough in a warm place for about an hour, or until it is double in size.  I used a warming drawer, but the oven works well, too, if you turn it on as low as possible, let it heat a few minutes, then turn it off and put the dough in.  Or you could put a big bowl of hot water in a cold oven next to the dough.


After about an hour it looked like this:


After punching down the dough, I shaped it into two round loaves, and put those on parchment to rise, covered with a clean cloth.  After about half an hour, the loaves were twice as big, so I brushed them with milk and sprinkled caraway seeds on top.  Preheat the oven to 375 F (200 C) and bake for about 35 to 40 minutes, or until they sound hollow when tapped.  Cool on a rack.

Soda bread for St. Patrick's day--soodaleipä


Happy St. Patrick's day from Cooking Finland!  I decided to make some Irish soda bread to go with the corned beef that I have cooking in my slow cooker.  When I went looking for a recipe, I found this Scottish soda bread recipe in Beatrice Ojakangas' book, Great Whole Grain Breads.  Since we aren't a bit Irish anyway, this recipe will probably be perfect for us!

I started out following the recipe, but made a few modifications as I went along.  The ingredients were:

2 cups whole wheat flour (4.75 dl)
1 cup bread or all purpose flour (2 1/3 dl)
1/2 cup rolled oats
1 teaspoon baking powder
1 teaspoon baking soda
1/2 teaspoon salt
3 tablespoons melted butter
1 1/2 cups buttermilk (3.5 dl, and you could substitute piima or kefir here)
I also added 2 Tablespoon of sugar which were not in the original recipe.


I liked this recipe because it incorporates so many whole grains.  There are a lot of sweet soda bread recipes available, often with raisins, but the kids often complain about dried fruit in their bread.

Preheat the oven to 375 F (200 C), this dough does not contain yeast, it should be baked right away.

First, I mixed all of the dry ingredients together in the bowl of my stand mixer, then poured in the butter milk and made a very stiff dough that looked like this:


I kneaded the dough a bit longer by hand (Beatrice recommends about a minute--I didn't use a timer, just until it felt smooth and well mixed).  Then I shaped it into a ball, pulling all of the edges toward the bottom of the loaf.  I shaped it upside-down, using oats instead of flour on the work surface, like this:


When you turn the loaf over, it has a nice oat-covered, smooth crust.


I used a sharp knife to cut an X on the top before baking the bread for about 40 minutes, until it sounded hollow when thumped.

Beatrice recommends letting it set for at least 4 hours so it will be easier to cut, that will be just about the time the kids are home from school.  I'll edit this post later and tell you how it was!

Tuesday, March 15, 2011

Opera sandwiches--Oopperaleivät


Yesterday was the first day back to school since daylight savings time, our whole family felt like we had a bit of jet-lag!  These quick sandwiches were just the thing to make us feel a bit better.  I am not sure why these are called opera sandwiches, but I have read online that they were served in the 1950s and 60s at dances.  They are a perfect food for when you stay up too late and need something full of protein to fill you up!

These are basically an open-faced hamburger on a piece of french toast, with an egg on top.  

I have a large griddle to fry on, so first I cooked a package of hamburger (around 2 pounds or 1 kilo) in 6 patties.  While these were frying, I broke two eggs in a bowl, stirred them, then added a little less than a cup (2 dl) of milk.  Completely submerge bread slices in the egg mixture and fry in a pan that has just a bit of melted butter.  This amount made 6 slices of bread, but the bread I used had large slices.


My griddle is so big that I was able to fry all at once.  


After removing the hamburger patties and french toast, fry one egg for each sandwich.  Leave plenty of room around the eggs so they don't stick together.  We like our eggs with the yolks broken and cooked hard.  You could make them "sunny side up" also.


These sandwiches go great with a fresh salad and a big slice of onion on top.  Or try them in the Finnish style with a couple of pickled beets.  Only my daughter and I ate them with the beets on top, but they were MUCH better like that!